Your Sony TV’s standby LED is flashing red exactly 6 times, pausing, then repeating. That pattern points to a backlight or power supply fault. It’s fixable. I’ve repaired this specific blink code on dozens of Sony Bravia sets over 20 years, and most cases come down to a handful of replaceable components. Below I’ll walk you through what’s happening inside the TV and the fixes that actually work, ranked from free to most expensive.
- 6-blink code = backlight or power fault. Sony TVs flash the standby LED 6 times when the backlight strips or power supply board can’t deliver correct voltage
- Power cycling fixes roughly 30% of cases. Unplugging for 60 seconds and holding the power button drains residual charge that causes false error states
- Blown fuses cost $1-10 in parts. Total repair with labor runs $75-150, making this the most affordable component fix
- Bulging capacitors are visually identifiable. Swollen or leaking tops confirm failure, with parts costing $5-15 and total repair running $100-250
- Full power supply board replacement runs $200-475. Weigh this against the TV’s current value before committing to the repair
#What Does the Red Light Blinking 6 Times Mean on a Sony TV?
Sony TVs use blink codes to self-diagnose internal hardware faults. The standby LED flashes in a 6-cycle pattern to signal problems powering the backlight or internal circuits.
The backlight refers to the LED strips behind the LCD panel that provide screen illumination. Every modern Sony TV (including the Bravia 9, Bravia 8, Bravia 7, and Bravia 3 lines) uses LED backlighting. When those strips fail or don’t receive adequate voltage, the display stays black because the LCD panel can’t produce a visible image without light behind it. This is the same root cause behind a Sony TV with sound but no picture.
The power supply board transforms high-voltage AC from your wall outlet into the specific DC voltages each TV component needs. If that conversion fails, critical parts stop working. The TV’s built-in protection circuit detects the voltage problem, shuts everything down to prevent further damage, and triggers the blinking pattern you see instead of a working screen.
According to Sony’s official support documentation, blink codes help identify the general fault area so technicians can narrow down the problem quickly.
#What Causes a Sony TV Red Light to Blink 6 Times?
The 6-blink code covers several specific failure points. Here are the most common culprits I see after repairing Sony Bravia TVs across multiple generations:
-
Failed backlight LED strips. Burnt out or disconnected LEDs prevent the display from illuminating. This is the single most common hardware cause.
-
Defective LED driver board. This circuit drives the LED strips with the correct voltage and current. When it fails, backlights can’t activate even if the strips themselves are fine.
-
Blown fuses. Small replaceable fuses on the power board sacrifice themselves when they detect abnormal current spikes. One blown fuse can shut down the entire backlight circuit.
-
Aging, bulging capacitors. Electrolytic capacitors degrade over time, losing their ability to smooth and filter electricity. Swollen tops or leaked electrolyte are telltale signs.
-
Short circuit on a power rail. Internal shorts disrupt the flow of operating voltages across the board.
-
Power surges. Grid fluctuations from storms or unstable wiring fry components gradually. A single bad surge can kill a fuse or capacitor instantly.
-
Faulty ribbon cables. Fragile flat connectors between boards degrade over time, preventing proper communication between the power supply and backlight driver.
-
Dust contamination. Buildup creates stray connections that short tightly-packed circuits, especially in warm environments where the TV runs for long hours.
#How Do You Fix a Sony TV Blinking Red Light 6 Times?
Work through these fixes in order. The first three are free and take minutes. The later ones require opening the TV.
Tip: photograph key landmarks during disassembly to help with reassembly later.
#1. Power Cycle the TV
Power cycling drains residual charge from internal capacitors and clears temporary memory errors. It’s the single most effective free fix.
- Unplug the TV from the wall outlet for 60 seconds.
- Press and hold the power button on the TV (not the remote) for 15 seconds to drain stored charge.
- Plug it back in and turn on the TV to check if the blinking stops.
This works for about 30% of cases. If your TV powers on normally after this, the error was likely a false trigger from a momentary voltage fluctuation in your home’s electrical supply. No further repair needed.
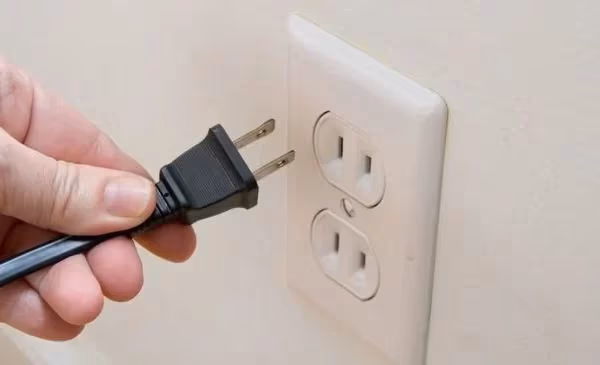
#2. Check Cables and Try a Different Outlet
Loose cables and faulty power sources mimic hardware damage. Rule these out before opening anything.
- Verify all cable connections are snug at the TV and wall outlet.
- Inspect the power cord for damage, fraying, or bent prongs.
- Plug the TV directly into a wall outlet, bypassing any power strip or surge protector.
- Try a different outlet in another room to eliminate electrical issues.
If the TV works on a different outlet, your original outlet or power strip is the problem. Add a quality surge protector rated for electronics to protect against future grid issues.
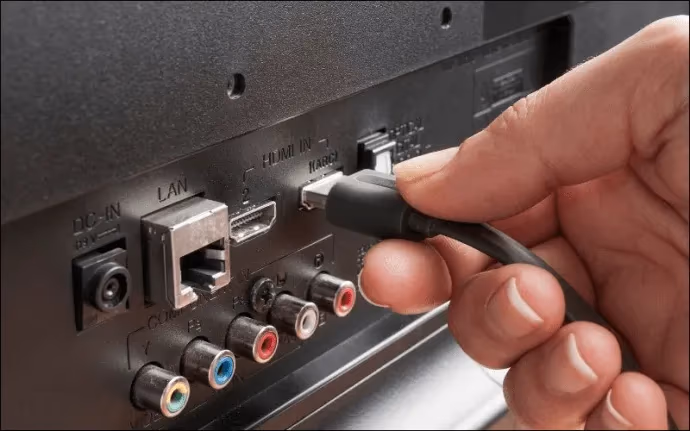
#3. Disconnect All External Devices
A faulty external device can sometimes trigger cascading errors in the TV’s power management. I’ve seen a shorted HDMI cable from a Roku with a blinking white light cause exactly this symptom.
- Unplug all HDMI cables, USB devices, soundbars, and streaming sticks.
- Power cycle the TV with nothing connected.
- If the blinking stops, reconnect devices one at a time to identify the culprit.
#4. Update Firmware
Outdated firmware occasionally causes false blink codes. This fix only works if the TV powers on long enough to access menus.
- Navigate to Settings > Product Support > Software Update.
- Download and install the latest patch over Wi-Fi.
- Keep the TV plugged in during the entire update process.
- Restart the TV after the update completes.
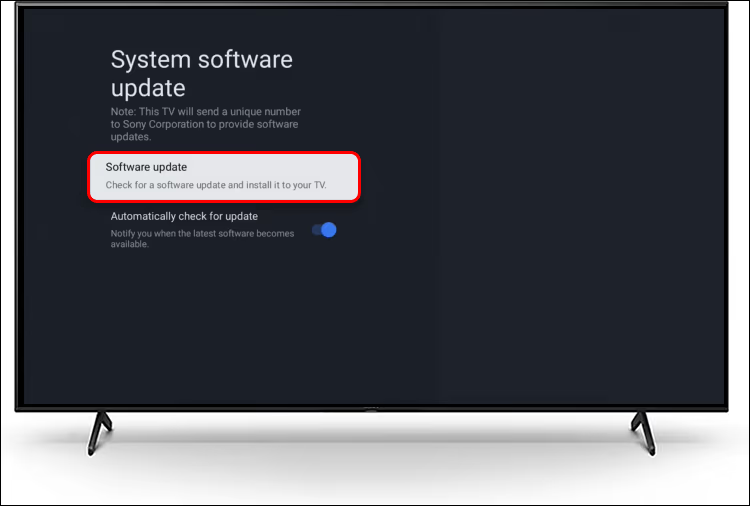
On newer Sony Bravia models running Google TV, the path is Settings > System > About > System software update.
#5. Factory Reset the TV
If the TV powers on intermittently, a factory reset eliminates any corrupt settings that might contribute to the error.
- Go to Settings > Device Preferences > Reset > Factory data reset.
- Confirm the reset and wait for the TV to reboot into the initial setup screen.
- You’ll lose all saved Wi-Fi passwords, app logins, and picture settings.
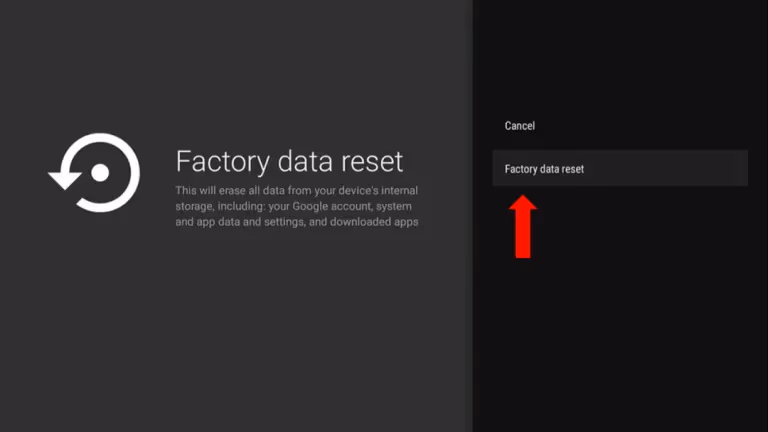
A factory reset rarely fixes the 6-blink code on its own since the pattern almost always points to hardware. But it takes 5 minutes and costs nothing, so it’s worth trying before cracking open the back panel.
#6. Inspect and Replace Backlight LED Strips
This is where you start working inside the TV. LED strip failure is the most common hardware cause of the 6-blink code, and the symptoms overlap with vertical lines on a Sony Bravia screen in some cases.
Checking the strips:
- Remove the back panel screws and carefully lift the cover off.
- Locate the LED strip connectors on the board and check for cracks, corrosion, or loose plugs.
- Use a multimeter to check voltage at the LED connector. Zero voltage means the driver circuit is the problem, not the strips.
Replacing strips:
- Order replacement LED strips matching your TV’s panel size and model number. Parts run $20-50. Total repair with labor is $100-300.
- Gently peel old strips from the adhesive backing behind the panel.
- Mount new strips and reconnect to the same ports.
- Test before fully reassembling.
Never power LED strips outside the TV housing. They'll burn out instantly without proper heat dissipation from the metal backing plate.
#7. Check and Replace Fuses and Capacitors
Blown fuses and bulging capacitors are the easiest components to diagnose visually and the least expensive to fix.
Finding blown fuses:
- On the power supply board, locate the small glass or ceramic fuses.
- Check each fuse for continuity with a multimeter. No continuity means it’s blown. Scorching or blackening is also a dead giveaway.
- Note the exact amperage rating before ordering replacements. A $1-10 fuse with $75-150 in labor can save the entire TV.
Finding bad capacitors:
- Look for electrolytic capacitors with bulging, domed, or leaking tops. Healthy caps have perfectly flat tops.
- Use a multimeter’s capacitance mode to confirm failure on any suspect units.
- Replacements cost $5-15 in parts. Total repair including labor runs $100-250.
Replacing either component:
- Desolder the failed part using a soldering iron and solder wick.
- Install the replacement, matching polarity for capacitors and amperage for fuses.
- Clean any leaked electrolyte with isopropyl alcohol before reassembling.
Never bypass a fuse with wire or foil. Fuses exist to protect the board from catastrophic damage. Bypassing one will almost certainly destroy more expensive components.
#8. Replace the LED Driver or Power Supply Board
If individual component swaps don’t resolve the issue, the entire board may need replacement.
LED driver board: This circuit converts the power supply output into the specific voltage and frequency the LED strips need. No output voltage at the LED connector (with correct input voltage) confirms a failed driver. On some Sony models, the LED driver is integrated into the power supply board.
Power supply board: This is the largest board in the TV, usually mounted near the power inlet. Check major voltage rails with a multimeter against the values printed on the board’s silkscreen. Missing or incorrect voltages confirm failure.
Replacement boards cost $50-150 for parts. Total repair with a technician runs $200-475 depending on the model. For TVs older than 5-6 years, compare this cost against a new Sony TV.
#9. Access the Service Menu for Diagnostic Codes
Sony TVs have a hidden service menu with error logs that can pinpoint the exact failed component.
To access the service menu on most Sony Bravia models:
- With the TV off (standby), press this sequence on the remote: i+, 5, Volume Up, Power.
- On remotes without an i+ button, try: Display, 5, Volume Up, Power.
Once inside the service menu:
- Navigate to the self-check or error log section.
- Note any hardware fault codes and research them for your specific model number.
- Clear correctable errors after fixing the underlying issue.
Don't change any values in the service menu unless you know exactly what they do. Incorrect settings can disable the TV entirely.
For more details on service menu navigation, iFixit’s Sony TV troubleshooting wiki covers model-specific steps.
#How Much Does It Cost to Repair?
Here’s what you’ll pay in 2026 for each type of repair:
| Repair | Parts Cost | Total with Labor |
|---|---|---|
| Fuse replacement | $1-10 | $75-150 |
| Capacitor replacement | $5-15 | $100-250 |
| LED backlight strip | $20-50 | $100-300 |
| Power supply board | $50-150 | $200-475 |
DIY repairs save $75-200 compared to hiring a technician, but they require a multimeter, soldering iron, and comfort working around high-voltage components. Check your warranty first. If the TV is still covered, contact Sony Support before buying any parts, since warranty repairs cover both labor and components at no cost.
If a similar blinking pattern shows up on a different brand, the diagnostic approach is nearly identical. I’ve written a separate guide for Hisense TV blinking red light that covers the same troubleshooting logic.
#Bottom Line
Start with the free fixes: power cycle, check cables, and try a different outlet. If those don’t work, open the back panel and look for visually obvious damage like bulging capacitors or scorched fuses. Parts cost under $15. Most people with basic soldering skills can swap a fuse or capacitor in under an hour, which makes these the best bang-for-buck repairs on any Sony Bravia. For anything involving the LED driver or full power supply board, get a repair quote first and weigh it against the TV’s age. A 3-year-old Sony Bravia 8 is worth repairing. A 7-year-old entry-level set probably isn’t.
#Frequently Asked Questions
#What does it mean when a Sony TV blinks red 6 times?
It signals a fault in the backlight circuit or power supply. The TV’s built-in protection system shuts everything down when it can’t deliver the correct voltage to the LED backlight strips. This self-diagnostic code helps technicians narrow the problem to the power delivery and display illumination system rather than the main processor or signal boards.
#How do I fix my Sony TV red light blinking 6 times?
Unplug the TV for 60 seconds and hold the power button for 15 seconds to drain stored charge. This clears about 30% of cases. If it doesn’t work, check your power source and cables, then disconnect all external devices. Persistent blinking after these steps usually means a hardware component like a fuse, capacitor, or LED strip has failed and needs replacement.
#Can a Sony TV blinking red light be fixed without a technician?
Yes, for many cases. Power cycling, cable checks, and firmware updates require zero tools. Fuse and capacitor replacements need a multimeter and soldering iron but are straightforward if you’ve soldered before. LED strip swaps are trickier because they require careful disassembly of the panel layers. Full board replacement is the most involved DIY repair but still doable with a service manual.
#How much does it cost to fix a Sony TV with a blinking red light?
Repair costs in 2026 range from $75-150 for a fuse replacement to $200-475 for a full power supply board swap including labor. DIY fuse and capacitor repairs cost under $15 in parts.
#What causes Sony TV backlight failure?
Power surges are the most common trigger, followed by natural capacitor degradation from heat and age. Capacitors in TVs that run 8+ hours daily tend to fail sooner. Dust buildup traps heat around components, accelerating wear. Manufacturing defects in specific LED strip batches also cause premature failure on certain model years.
#How do I reset a Sony TV that won’t turn on?
Unplug it from the wall for a full 60 seconds, then press and hold the physical power button on the TV for 15 seconds while it’s unplugged. Plug it back in and try powering on; if the TV still won’t respond, the problem is hardware and a reset alone won’t fix it.
#Is it worth repairing a Sony TV with 6 red blinks?
It depends on the TV’s age and the failed component. A blown fuse or bad capacitor on a 2-3 year old Sony Bravia costs $75-250 to fix professionally. That’s well worth it on a TV that cost $1,000+. A failed power supply board on a TV older than 6 years often costs more to repair than the set is currently worth. Get a repair estimate before deciding.
#How do I access the Sony TV service menu?
On most Sony Bravia models, turn the TV off to standby, then press this button sequence on the remote: i+, 5, Volume Up, Power. Some models use Display, 5, Volume Up, Power instead. The service menu shows error logs and diagnostic codes that pinpoint failed components. Don’t change any values unless you know exactly what they control, as incorrect settings can brick the TV.