Vertical lines on your Sony Bravia TV usually point to a connection problem between the display panel and the board that feeds it data. I’ve tested these fixes on multiple Sony Bravia models, and the root cause typically falls into one of a few categories: loose ribbon cables, a failing T-Con board, corroded tab bonds, or something as simple as a firmware glitch.
- Power cycling is the most common fix — unplug the TV and hold the power button for 60 seconds to clear firmware glitches
- A single bent HDMI pin can produce vertical lines — inspect cable contacts and ports under bright light before opening the TV
- T-Con board and ribbon cable connections loosen over time, and reseating them often restores a clean picture
- Tab bond corrosion hit 2010-2013 Sony Bravia models hard after 5+ years of use, especially with harsh screen cleaners
- Professional repair runs $70-$350 depending on whether the fix involves cable replacement, T-Con swap, or solder rework
#What Causes Vertical Lines on a Sony TV Screen?
The most common root causes of vertical lines on Sony Bravia TVs break down like this:
Firmware Glitch: A bug in your TV’s firmware can scramble the signal and cause lines. A reset typically clears it.
HDMI Issues: Damaged HDMI ports or cables with bent pins introduce static and lines into the picture.
Power Supply: Voltage fluctuations from wall sockets or failing surge protectors create all sorts of visual artifacts.
T-Con Board: Failed connections between this board and the panel result in missing pixel data.
Corroded Tab Bonds: Screen cleaners can corrode the bonds linking the panel’s row drivers, causing pixel rows to misfire.
Knowing which component is failing matters before you attempt any fix. Here’s what happens inside your TV when those vertical lines show up.
Video data and electricity flow through multiple components before reaching the LCD or OLED grid. Any break in this chain disrupts the signal:
1. Data Input: Content arrives via HDMI, coaxial, or RCA cables and plugs into the main board.
2. Video Processing: The processor decodes the data, then passes it to the Timing Control (T-Con) board.
3. Signal Distribution: The T-Con splits data across ribbon cables to row drivers (tab bonds) on the panel.
4. Pixel Illumination: Tab bonds tell their pixel rows to light up at the correct color and intensity.
Vertical lines mean something is disrupting the signal to specific rows on the panel. The underlying cause could be a faulty HDMI cable, a firmware bug scrambling the processing, dirt or corrosion breaking T-Con or tab bond connections, or fluctuating electricity failing to power groups of pixels.
#How Do You Fix Vertical Lines on a Sony Bravia TV?
Start with the easiest fixes first and work your way toward the internal components. Each step below eliminates one potential cause.
#Step 1: Power Cycle Your Sony TV
Power cycling clears temporary firmware glitches that scramble the video signal. This fix works more often than you’d expect.
- Turn your TV off via the power button. Unplug it from the wall.
- Press and hold the power button for 60 seconds to drain residual electricity.
- Leave the set unplugged for at least 5 minutes. Larger models benefit from up to an hour.
- Plug your Sony Bravia TV back in firmly and turn it on with the power button.
If the lines persist after power cycling, your TV may have a deeper power issue. This guide on Sony TVs not turning on can help diagnose that.
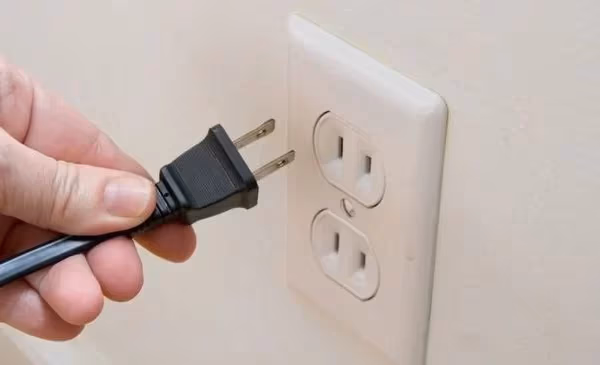
#Step 2: Check Household Power Supply
Modern flat-screen TVs need stable electricity. Inadequate or fluctuating voltage from the wall socket can cause video artifacts:
- Use a multimeter to check voltage from the wall socket while the TV is on. Verify it stays between 110V and 120V with minimal fluctuations.
- Inspect the power cable for bent pins or loose connections. Try a different cable if one is available.
- Connect the TV directly to a wall outlet instead of a surge protector or power strip.
- Eliminate sources of electrical interference such as lamps, routers, or other high-draw devices on the same circuit.
- For consistently clean power, use a UPS (uninterruptible power supply).
If the lines disappear when plugged directly into a stable outlet, the TV itself is fine. The problem was the power source.
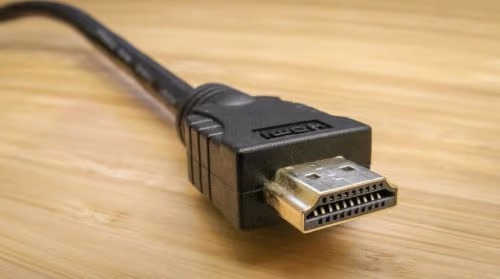
#Step 3: Inspect and Replace HDMI Cables
A single pin failure in an HDMI cable can drop an entire video channel and produce vertical lines.
- With the TV powered off, disconnect all HDMI cables from the back of the TV.
- Check cable contacts under bright light. Look for bent pins or dark, corroded surfaces.
- Inspect the matching HDMI ports on the TV for bent pins or damage. A magnifying glass helps.
- Try powering on the TV with no external devices connected to isolate the issue.
- Replace old HDMI cables with new certified HDMI cables if you see any physical damage.
Thin HDMI wires degrade from sharp bends over time. TV port failure can also happen when cables get yanked roughly. If you’re seeing a blank screen instead of lines, check this guide on Sony TV with sound but no picture for related troubleshooting.
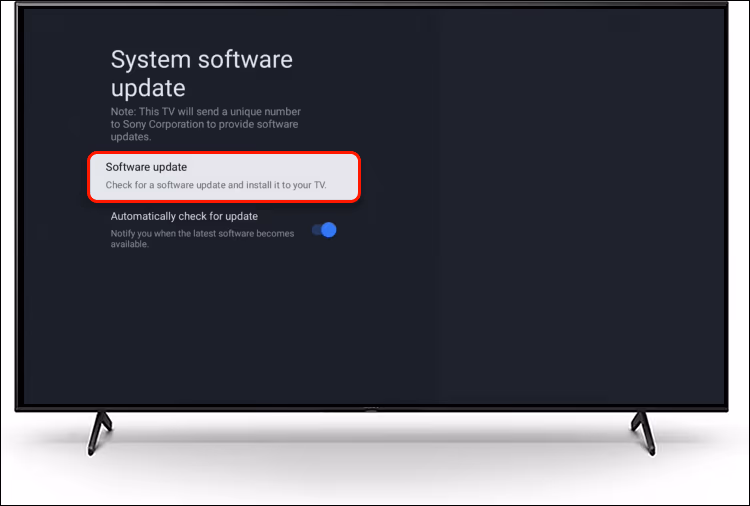
#Step 4: Update Your Sony TV Firmware
A firmware bug can scramble the video signal and cause lines. Keeping your TV updated prevents this.
For Sony Google TV models (2021 and newer):
- Navigate to Settings > System > About > System software update.
- Enable automatic updates so new firmware installs on its own.
- Select “Software update” to check for the newest available version.
For older Sony Android TV models:
- Navigate to Settings > Device Preferences > About > System Update.
- For models too old for OTA updates, download firmware to a USB drive from Sony’s support site.
Check Sony’s support page for your specific model every few months, even if your picture looks fine. Preventive updates reduce the odds of future display problems.
#Step 5: Examine the T-Con Board and Ribbon Cable
The Timing Controller (T-Con) board processes data from the mainboard and routes it to pixel rows across the screen via ribbon cables. If the T-Con board isn’t properly seated or the ribbon cable connections are compromised, vertical lines appear.
- Power off the TV, unplug the power cable, then lay the TV face down on a soft surface.
- Unscrew and carefully remove the back panel.
- Locate the T-Con board, usually toward the bottom with ribbon cables leading to the panel.
- Check ribbon cable seating under bright light with a magnifying glass. Look for gaps in the ZIF socket that suggest a loose connection.
- Gently press down along the length of the ribbon cable to reseat it. Press the locking connector if present.
- Inspect cable pins for dirt buildup or dark, corroded spots. Use 90% isopropyl alcohol on a cotton swab to clean them.
- Reassemble the TV and test for line resolution.
If reseating doesn’t fix the lines, the T-Con board itself may be failing, or the tab bonds linking to the panel could be the problem.
#Step 6: Use Tape To Block Faulty T-Con Pins
Since the video signal passes through the T-Con board, failure here shows up as lines corresponding to disrupted data channels. There’s a temporary fix where you use non-conductive tape to block the malfunctioning pins and force pixel rows to fill in data from surrounding channels.
This procedure requires precision. One wrong connection can permanently damage your TV. Only attempt this under an experienced technician's supervision.
- After unplugging the TV and removing the back panel, locate the T-Con board and ribbon cables.
- Get a multimeter and non-conductive tape such as Kapton tape.
- Power the TV on and identify the vertical lines corresponding to T-Con pin failure.
- Using the multimeter in continuity mode, gently touch along the ribbon cable pins to identify which one transmits the faulty signal.
- Once the malfunctioning pin is confirmed, power down the TV and use Kapton tape to mask the pin, blocking signal transmission along that channel.
- Reassemble and confirm the line has disappeared. You may need to block additional pins if multiple lines were showing.
This pin-blocking method has brought TVs back to life when the T-Con board signal has degraded. Surrounding channels provide the missing data to fill in those lines. But this is an advanced procedure with real consequences if pins are damaged.
#Step 7: Check Tab Bonds Connecting T-Con to Panel
The last component that could be causing vertical lines is failed tab bonds leading to the panel. These tiny controller boards connect the T-Con ribbons to the pixel rows across your screen. The adhesive attaching them to the glass is vulnerable to corrosion over several years.
If this adhesive deteriorates, rows of pixels disconnect, creating missing lines in the video. Tab bond failure requires soldering rework to properly refasten them. If you suspect this is the issue based on evenly spaced lines, here are some validation steps:
- Examine the inside edge of the panel for any visibly detached tab bonds using a flashlight.
- Lightly flex the panel to detect intermittent line shifting, which signals disconnected tab bonds.
- Power on the TV and observe whether sharply tapping the bezel shifts or eliminates lines.
Any positive results likely point to tab bond failure. For other related diagnostics, see this guide on Sony TV blinking red light 6 times.
#Should You Call Sony Support or a Repair Service?
Before opening up your TV or spending money, consider whether to handle this yourself or escalate to Sony or a local repair shop.
#Contact Sony Support
If your TV is under the 1-year factory warranty, call Sony support immediately about the vertical lines. Be polite but persistent until they provide an RMA or service appointment.
- Sony Support Phone: 1-800-222-7669
- Sony Support Website: sony.com/en/support
Document everything: mention that you’ve already power cycled, checked cables, and updated firmware. If your TV is still under warranty, push for full coverage of inspection and repairs given the known vertical line defect in certain Sony Bravia models.
#Find a Local TV Repair Shop
If your warranty recently expired, call Sony Support anyway to document the defect and ask about financial assistance with repairs.
Whether that works or not, find a highly reviewed local TV repair shop that works on Sony models. Avoid big chain shops with high overhead. The right technician can pinpoint the root cause and quote you on fixes like:
- Ribbon cable replacement
- T-Con board swap
- Tab bond solder rework
- Power supply module replacement
An experienced repair tech can fix most TVs showing vertical line symptoms. Between possible Sony financial assistance and reasonable shop pricing, repair is usually cheaper than buying a replacement.
#FAQs about Vertical Lines on Sony Bravia TVs
#Why did vertical lines suddenly appear after years of normal use?
Many 2010-2013 Sony models developed this problem as internal tab bond connections slowly corroded over 5+ years. The adhesive holding these tiny controller boards to the glass panel breaks down gradually, especially when corrosive screen cleaners are used regularly.
#Can a firmware update fix vertical lines?
It depends on the root cause. If a firmware bug is scrambling the video signal, an update can clear it up entirely. Lines caused by physical damage to the T-Con board, ribbon cables, or tab bonds require hands-on repair. Always update firmware first since it’s the easiest step to rule out.
#Will replacing HDMI cables fix the lines?
Swapping cables works when the artifacts stem from bent pins or cable deterioration introducing static into the signal. Lines from internal panel or board failures need deeper intervention like reseating ribbon cables or replacing the T-Con board.
#How much does vertical line repair cost on a Sony Bravia?
Repair costs vary based on the failed component. T-Con board or ribbon cable replacement runs $70-$150. Tab bond solder rework costs $150-$350. A full cleaning and reseating of all internal connections typically falls between $100 and $200. These prices assume the mainboard still functions properly.
#Is repairing an older Sony TV worth it compared to buying new?
For Sony Bravia sets under 10 years old, repair usually costs significantly less than a comparable replacement. Beyond 10 years, replacement starts making more financial sense, especially if multiple components show wear.
#Do vertical lines always mean the panel is damaged?
Not at all. In most cases, the panel itself is fine. The problem usually traces back to loose ribbon cables, a failing T-Con board, or corroded tab bonds. Only after ruling out these components should you consider panel damage as the cause.
#Can I fix vertical lines on my Sony TV without opening it up?
Yes, several fixes work without disassembly. Power cycling the TV, checking HDMI cables, updating firmware, and testing different wall outlets can all resolve lines caused by firmware glitches or external connection problems. Internal fixes like reseating the T-Con ribbon cable do require removing the back panel.
#Bottom Line
Start with the free fixes: power cycle your TV, swap HDMI cables, and update the firmware. These three steps eliminate the most common causes of vertical lines on Sony Bravia TVs without any tools.
If lines persist, open the back panel and reseat the T-Con ribbon cables. Clean the connector pins with isopropyl alcohol while you’re in there.
For evenly spaced lines on older models, suspect tab bond corrosion. That’s a job for a repair technician with soldering experience. Call Sony at 1-800-222-7669 if your TV is under warranty, or find a local shop for out-of-warranty repairs.
If the lines end up persisting across different brands, you can reference fixes for vertical lines on Samsung TVs and vertical lines on Vizio TVs to compare root causes.