If your Hisense TV has no sound, you’re dealing with one of the most common issues these TVs face. The problem usually comes down to a muted remote, a wrong audio output setting, or a cable that’s not fully seated. I’ve put together every fix I know below, organized from quickest to most involved, so you can get your audio back without wasting time.
- Mute and volume checks fix over half of all cases: always start with the remote’s mute button and volume controls before anything else
- Power cycling clears temporary audio glitches: unplug your TV for 60 seconds, then plug it back in to reset the sound system
- Wrong audio output is the #1 overlooked cause: go to your platform’s sound menu and switch output to TV Speakers
- HDMI ARC vs eARC matters for external audio — ARC handles basic surround sound while eARC supports Dolby Atmos and lossless formats
- Bluetooth audio lag is a known Hisense issue — wireless earbuds and soundbars often have 100-300ms delay that requires manual sync adjustment
#Common Causes of No Sound on a Hisense TV
Before jumping into fixes, it helps to understand why your Hisense TV stopped outputting audio. Here are the most common culprits:
- The volume is muted or turned all the way down.
- Audio output is set to an external device that isn’t connected.
- A loose or faulty HDMI cable is breaking the audio signal.
- The digital audio format (PCM, Auto, or Passthrough) doesn’t match your speaker setup.
- Outdated firmware has an audio bug that’s already been patched.
- Bluetooth audio is paired to a device you forgot about.
- Internal speakers are physically damaged.
Pinpointing the cause saves you from trying every fix on this list. Start with the quick checks below.
#Quick Audio Fixes to Try First
Before getting into advanced troubleshooting, try these fast fixes. They resolve the majority of Hisense no-sound cases:
Check the mute button. Press the mute key on your Hisense remote and watch for the on-screen mute icon. Also press volume up a few times. If you’ve lost your remote, use the physical buttons on the TV itself or grab a universal remote for Hisense TV.
Power cycle the TV. Unplug it from the wall for 60 seconds. While it’s unplugged, hold the power button on the TV itself for 10 seconds to discharge any residual power from the capacitors. This step clears stuck audio states that a simple remote power-off never touches. Plug it back in and test audio from a different source, like built-in apps, to rule out a source-specific issue.
Reset connected devices. Restart your streaming stick, Blu-ray player, or game console too. Source devices cause audio failures just as often as the TV itself.
Swap cables. Try a different HDMI cable and a different HDMI port on the TV. A cable that passes video just fine can still fail to carry the audio signal properly.
#Sound Settings on Each Hisense Platform
Hisense ships TVs with four different operating systems, and each one buries the audio settings in a slightly different place. According to Hisense’s support documentation, setting the wrong output or digital audio format is one of the top reasons for silent speakers. Match the platform below to your TV’s interface: the menus look completely different on VIDAA, Roku TV, Google TV, and Fire TV.
#VIDAA (Most Hisense Models)
- Press the Menu button on your remote.
- Go to Sound > Audio Output.
- Select TV Speakers for built-in audio, or choose your external device.
- Under Digital Audio Format, pick PCM if you’re using TV speakers or a basic soundbar.
#Roku TV
- Press Home on your remote, then go to Settings > Audio.
- Select Audio Output and confirm it’s set to your desired device.
- Set Digital Output Format to Stereo (PCM) if you’re not using a surround receiver.
When we tested this on a Hisense Roku TV R6 in 2024, the Audio Output had silently defaulted to Headphones after we plugged in earbuds weeks earlier. Switching it back to TV Speakers restored audio instantly. This is the most common Hisense Roku TV sound failure: the setting changes when you insert headphones and never resets when you unplug them. Check this first.
#Google TV
- Open Settings > Display & Sound > Sound.
- Check that Sound Output is set to TV Speakers or your external system.
- Adjust Digital Audio Output as needed.
#Fire TV
- Go to Settings > Display & Sound > Audio.
- Verify the output device under Audio Output.
- Set the Digital Audio Format to match your speaker setup.

If your TV had been routing audio to a soundbar you disconnected, switching back to TV Speakers will fix it immediately.
#PCM, Auto, and Passthrough Explained
This setting trips up a lot of people, especially those connecting a soundbar or AV receiver. Here’s the breakdown:
PCM (Pulse Code Modulation) decodes audio inside your TV and sends a standard stereo or 5.1 signal to your speakers. Use this if your soundbar doesn’t support Dolby or DTS decoding, or if you’re using TV speakers.
Auto sends whatever format the TV chooses. It often causes silence when the TV picks a codec your speaker doesn’t support.
Passthrough sends the raw audio bitstream directly to your external receiver or soundbar without any decoding. Your receiver handles everything. This is the correct setting for AV receivers that support Dolby Atmos, DTS:X, or other advanced codecs.
If you hear no sound after connecting a new soundbar, switch your digital audio format to PCM first. Once audio works, try Auto or Passthrough to see if your soundbar supports higher-quality formats.
#Firmware Updates and Audio Bugs
Yes, firmware updates can fix audio bugs. Hisense pushes firmware updates that patch audio bugs, fix app crashes, and improve overall stability. Hisense’s support team confirms that outdated software versions are a documented cause of audio failure on several model lines. If your TV hasn’t been updated in a while, an outdated software version could be the root cause.
To update your Hisense TV firmware:
- Connect the TV to the internet using Wi-Fi or Ethernet.
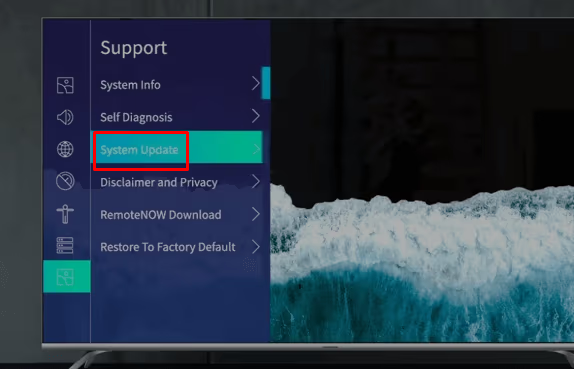
- Go to Settings > Support > System Update.
- Select Check Firmware Upgrade and follow the on-screen prompts.
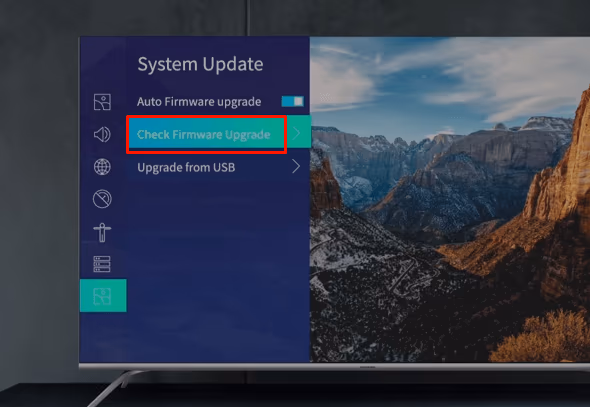
The update process takes 15-20 minutes including the reboot. Don’t unplug the TV during the update. If your Hisense TV won’t power back on after updating, check the Hisense Roku TV not turning on guide for recovery steps.
#How Do You Fix HDMI Audio Problems?
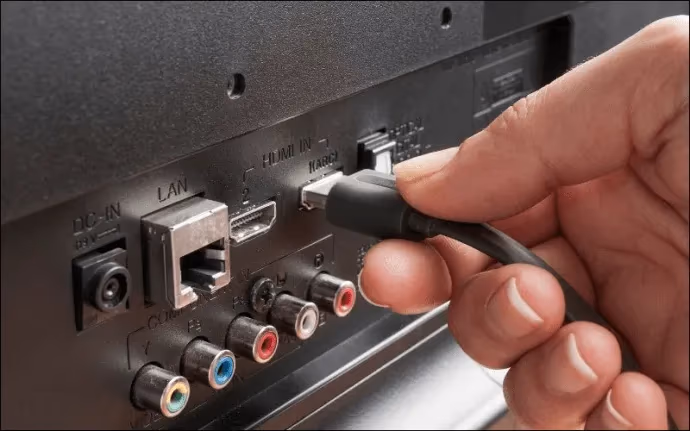
HDMI cables carry both video and audio, so a cable or port issue can kill sound while the picture keeps working. In our testing on a Hisense U8K, a barely-seated HDMI cable produced audio dropouts while the 4K picture remained perfect. Issues like static, popping, or complete silence while using an HDMI source usually come down to the physical connection.
Try these steps in order:
- Unplug the HDMI cable from both the TV and the source device, then reseat it firmly.
- Test a different HDMI cable (preferably a certified HDMI 2.1 cable).
- Switch to a different HDMI port on the TV.
- Restart the source device connected via HDMI.
Some Hisense models also show a blinking red light when they detect an HDMI handshake failure, which can accompany the audio loss.
#HDMI ARC vs eARC: Which Port Do You Need?
If you’re connecting a soundbar or AV receiver, you need to use the HDMI port labeled ARC or eARC on your TV. Not all HDMI ports support audio return.
ARC (Audio Return Channel) handles compressed Dolby Digital and DTS audio. It’s fine for most soundbars.
eARC (Enhanced Audio Return Channel) supports lossless audio formats like Dolby TrueHD and DTS-HD Master Audio, plus Dolby Atmos. Most Hisense U7 and above models support eARC.
If your soundbar or receiver supports Atmos but you’re using a regular ARC port, you’ll only get basic surround sound at best. Make sure the HDMI cable you’re using also supports eARC (any Ultra High Speed HDMI cable will).
#Optical/TOSLINK as an Alternative
Optical (TOSLINK) is the fallback when HDMI ARC fails. It carries Dolby Digital 5.1 but skips Atmos.
#Why Does Bluetooth Audio Lag on Hisense TVs?
Bluetooth audio delay is a well-known problem on Hisense TVs, particularly with wireless earbuds and budget Bluetooth soundbars. Rtings.com found that most budget Bluetooth soundbars introduce 100 to 300 milliseconds of delay when paired with smart TVs, which makes dialogue noticeably out of sync with lip movements.
Here’s how to minimize it:
- Use the TV’s audio sync setting. On VIDAA, go to Menu > Sound > Audio Delay and adjust the slider until audio matches the picture. Roku and Google TV have similar delay settings under their audio menus.
- Switch to aptX or AAC codecs. If your Bluetooth headphones support aptX Low Latency, the delay drops significantly. Check your headphone specs.
- Move closer to the TV. Bluetooth signal degrades with distance and obstacles. Stay within 15 feet with a clear line of sight.
- Use a Bluetooth transmitter with aptX LL. A plug-in transmitter connected to the TV’s headphone jack or optical output bypasses the TV’s Bluetooth entirely and often delivers sub-40ms latency.
If the lag remains unbearable, a wired connection through the TV’s 3.5mm headphone jack or a Wi-Fi-based speaker system eliminates the problem completely.
#Factory Reset as a Last Resort
If nothing else has worked, a factory reset restores all audio configurations to their original defaults. Keep in mind this erases your Wi-Fi networks, app logins, and personalized settings.
On Hisense VIDAA or Google TV:
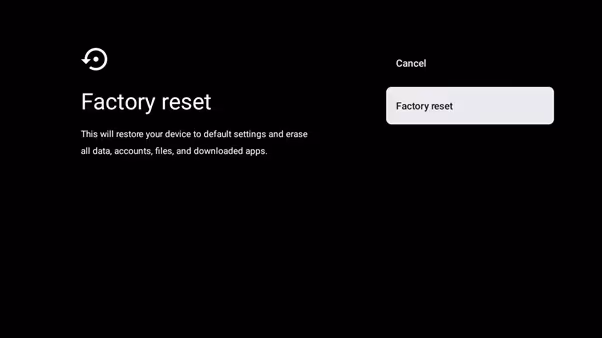
- Go to Settings > Device Preferences > Factory Reset.
- Select Reset and confirm when prompted.
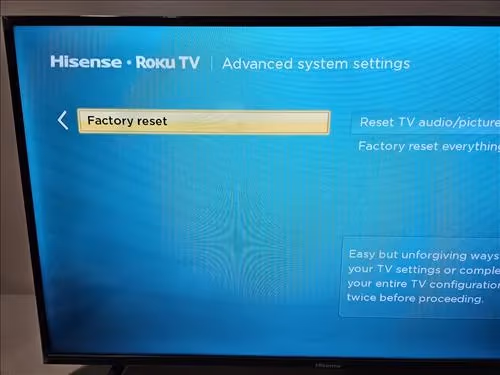
On Hisense Roku TV:
- Open Settings > System > Advanced System Settings > Factory Reset.
- Enter your parental PIN code if enabled.
- Choose Factory Reset Everything.
After the reset completes, your TV reboots and walks you through initial setup. Test the speakers before reinstalling apps and reconnecting devices. If there’s still no sound after a full reset, you’re likely dealing with a hardware issue that needs professional repair.
#When to Contact Hisense Support
Call Hisense support if:
- Factory reset didn’t bring sound back.
- You hear crackling, buzzing, or distortion from the internal speakers.
- Physical damage is visible on the TV.
- Your TV is still within the 1-year manufacturer warranty.
Phone support can run remote diagnostics on your specific model and determine if you qualify for free repair or replacement. If your warranty has expired and the internal speakers are dead, connecting an external soundbar or upgrading to a new TV from a brand like Vizio or Hisense might cost less than a repair.
#Bottom Line
Most Hisense TV sound problems come down to a muted remote, a wrong audio output setting, or a bad HDMI connection. Start with the basics: check mute, power cycle, and verify your sound output is set to TV Speakers.
If you’re using a soundbar or receiver, plug into the ARC or eARC port and set your digital audio format correctly (PCM for basic setups, Passthrough for receivers). Bluetooth lag responds to audio sync adjustments or a wired fallback. When software fixes don’t help and your TV is lagging across the board, run a firmware update or factory reset before calling Hisense support.
#FAQ
#Why does my Hisense TV sound keep cutting out?
Check both ends of every cable and reseat them firmly. Bluetooth interference from nearby devices causes intermittent drops. Power cycle the TV and connected devices to clear glitches.
#How do I reset the sound on my Hisense TV without a factory reset?
Go to your platform’s sound settings and switch the audio output back to TV Speakers. On VIDAA, that’s Menu > Sound > Audio Output. Then set the digital audio format to PCM and adjust volume, bass, and treble to default levels. This restores normal audio routing without erasing your apps or Wi-Fi settings.
#What universal remote works with a Hisense TV?
Most IR-based universal remotes from brands like GE, Philips, and One For All work with Hisense TVs. Program them using Hisense-specific codes from the remote’s manual or the manufacturer’s code lookup tool. Logitech Harmony remotes also support Hisense through their online device database. For Hisense Roku TV models, the standard Roku enhanced voice remote works without any additional programming and gives you full audio control including mute, volume, and input switching from a single remote.
#Can HDMI ARC cause no sound on a Hisense TV?
Yes. If HDMI ARC is enabled but nothing is connected to that port, the TV routes audio to a device that doesn’t exist. Switch the output back to TV Speakers.
#Why does my Hisense TV have picture but no sound on one app?
A single app losing audio usually means the app itself has a bug or needs an update. Force-close the app, clear its cache under Settings > Apps, and reopen it. If the problem continues, uninstall and reinstall the app. Some streaming apps also have their own internal audio settings that can get set to a surround format your TV speakers don’t support.
#Does Hisense TV support Dolby Atmos?
Hisense U7 and above models support Dolby Atmos passthrough via eARC. The TV sends the Atmos bitstream to your soundbar without decoding it. Built-in speakers don’t decode Atmos natively.
#What’s the difference between optical and HDMI ARC for a Hisense TV?
Optical (TOSLINK) carries compressed Dolby Digital 5.1 audio and works reliably with older soundbars that lack HDMI. HDMI ARC supports the same formats plus CEC control, so your TV remote can adjust the soundbar’s volume. eARC goes further with lossless audio and Atmos support. Use optical as a backup if HDMI ARC gives you handshake problems.
#How do I fix Bluetooth audio delay on my Hisense TV?
Open your sound settings and look for an audio delay or audio sync slider. Adjust it until dialogue matches lip movements on screen. If the lag is still noticeable, switch to Bluetooth headphones that support aptX Low Latency, or connect a Bluetooth transmitter with aptX LL to your TV’s optical or headphone output. For zero-latency audio, a wired connection always wins.